fluke 179 manual
Fluke 179 Manual: A Comprehensive Guide
This manual details the Fluke 179’s features, offering guidance for professionals needing precise electrical testing and troubleshooting capabilities in diverse industrial settings․
The Fluke 179 Digital Multimeter is a robust and reliable tool designed for electrical professionals․ Since 1948, Fluke Corporation has been a leader in providing testing and troubleshooting solutions, and the 179 embodies this legacy․ This meter is built to withstand demanding environments, making it ideal for field service, industrial maintenance, and electrical contracting work․
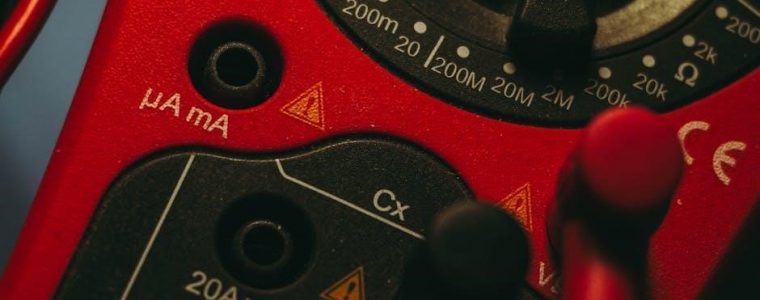
It offers a comprehensive set of measurement functions, including voltage, current, resistance, continuity, diode testing, temperature (specific to the 179 model), and capacitance․ The 179’s accuracy and dependability ensure reliable results, crucial for diagnosing electrical issues efficiently․ Its design prioritizes safety, featuring robust construction and adherence to relevant safety standards․ This manual provides detailed instructions on operating the Fluke 179, ensuring users can maximize its capabilities and maintain optimal performance․
Fluke Corporation History and Product Line

Founded in 1948, Fluke Corporation has established itself as a premier provider of electronic testing tools and software․ Initially focused on improving the reliability of vacuum tube voltmeters, Fluke quickly grew by addressing the needs of evolving industries․ Today, Fluke’s product line extends far beyond basic multimeters, encompassing oscilloscopes, thermal imagers, process calibrators, and quality of power analyzers․
The company’s commitment to innovation and quality has made its products essential for professionals in manufacturing, service, and electrical trades․ Fluke instruments are known for their durability and accuracy, often becoming mission-critical in demanding applications․ The Fluke 179, part of their extensive multimeter range, exemplifies this dedication, offering a balance of features and reliability․ Fluke continues to expand its offerings, adapting to the changing technological landscape and customer requirements․
Key Features of the Fluke 179 Digital Multimeter
The Fluke 179 is a robust, handheld digital multimeter designed for professionals needing reliable measurements in challenging environments․ It boasts automatic and manual ranging, providing flexibility for various applications․ Key features include the ability to measure AC/DC voltage and current, resistance, and continuity, alongside diode testing capabilities․
Notably, the 179 offers temperature measurement functionality, expanding its utility․ Its MIN/MAX/AVG recording function captures transient events, aiding in troubleshooting․ The HOLD function freezes readings for convenient review․ AutoHOLD mode enhances usability by automatically capturing stable readings․ Designed for efficiency, the Fluke 179 delivers accuracy and durability, making it a trusted tool for electrical professionals․
Display and Indicators
The Fluke 179 features a large, easy-to-read digital display capable of showing up to 20,000 counts, ensuring clear visibility of measurements․ The display incorporates a backlit feature, enhancing readability in dimly lit conditions․ Several indicators provide crucial information about the measurement process and meter status․
These indicators include units of measurement (V, A, Ω, etc․), auto-ranging status, data hold activation, and low battery warnings․ The display also shows the measurement mode selected (AC/DC voltage, resistance, etc․)․ Additionally, indicators signal continuity testing results and diode test functionality․ These visual cues contribute to accurate and efficient troubleshooting, allowing users to quickly interpret readings and diagnose electrical issues effectively․
Measurement Ranges and Accuracy
The Fluke 179 offers extensive measurement ranges to accommodate diverse electrical testing needs․ DC Voltage ranges from 200mV to 1000V, while AC Voltage spans from 200mV to 750V․ Current measurements (DC and AC) are supported up to 10A, with separate ranges for milliamps․ Resistance measurements cover from 0․1Ω to 40MΩ, suitable for a wide spectrum of components․
Accuracy is paramount; the Fluke 179 boasts a DC Voltage accuracy of ±0․09%, and DC Current accuracy of ±0․5%․ Resistance accuracy is specified at ±0․2%․ These specifications ensure reliable and precise readings․ The meter’s accuracy is maintained through rigorous testing and calibration procedures, guaranteeing dependable performance in critical applications․ Understanding these ranges and accuracy levels is vital for interpreting measurements correctly․
Operating Modes of the Fluke 179
The Fluke 179 provides several operating modes to enhance usability and measurement flexibility․ These include standard DC and AC voltage, current, resistance, continuity, diode test, and capacitance measurements․ A unique feature is temperature measurement, available specifically on the 179 model․ The meter also incorporates MIN/MAX/AVG recording functionality, capturing fluctuations and providing statistical data for analysis․
Furthermore, the Fluke 179 features both Manual and Auto ranging modes, allowing users to select their preferred method for setting measurement scales․ AutoHOLD mode is available to filter out unstable or noisy readings, ensuring accurate capture of stable signals․ The HOLD function freezes the displayed reading for convenient recording․ These modes collectively empower technicians to efficiently troubleshoot and diagnose electrical systems․
Manual vs․ Auto Range Selection

The Fluke 179 offers both Manual and Auto ranging, catering to different user preferences and measurement scenarios․ Auto ranging automatically selects the optimal measurement range for the input signal, simplifying operation for quick assessments and general troubleshooting․ This is ideal when the expected signal level is unknown․
Conversely, Manual ranging allows the user to explicitly choose the measurement range, providing greater control and potentially higher resolution for specific applications․ Experienced technicians often prefer Manual ranging for precise measurements or when dealing with signals of known magnitude․ Selecting the appropriate range minimizes display fluctuations and optimizes accuracy․ Understanding when to utilize each mode enhances the Fluke 179’s versatility and measurement precision․
Using the HOLD Function
The HOLD function on the Fluke 179 is a crucial tool for capturing and preserving a reading, particularly in situations where accessing the display is difficult or the measurement is unstable․ Pressing the HOLD button freezes the current displayed value, allowing you to remove the meter from the circuit or view the reading at your convenience․

This feature is invaluable when measuring points that are hard to reach or potentially hazardous․ To cancel the HOLD function and return to live measurement mode, simply press the HOLD button again․ Furthermore, in the Display HOLD mode, the meter effectively filters out unstable or noisy readings, ensuring a stable capture․ Utilizing HOLD enhances accuracy and safety during complex electrical assessments․
MIN/MAX/AVG Recording Functionality
The Fluke 179’s MIN/MAX/AVG recording feature is designed to automatically capture the minimum, maximum, and average values of a measurement over a specified period․ Initiated by pressing the HOLD button, this functionality is incredibly useful for identifying intermittent issues or fluctuations in a circuit․ The meter continuously monitors the input signal, recording the extreme high and low points, as well as calculating the average value․
To resume MIN/MAX/AVG recording after viewing the captured values, simply press the HOLD button once more․ This returns the meter to its monitoring state․ This feature provides a comprehensive understanding of measurement variations, aiding in efficient troubleshooting and analysis․ It’s a powerful tool for diagnosing unstable or fluctuating signals․

Specific Measurement Capabilities

The Fluke 179 Digital Multimeter excels in a wide array of electrical measurements, providing professionals with versatile diagnostic tools․ It accurately measures AC and DC Voltage, AC and DC Current, Resistance, and ensures continuity with its dedicated testing function․ Furthermore, it includes a Diode Test function for semiconductor analysis․
A unique capability of the Fluke 179 is its integrated Temperature measurement function, expanding its utility beyond standard electrical testing․ Additionally, it offers precise Capacitance measurement, crucial for evaluating components in electronic circuits․ These diverse capabilities, combined with its robust design, make the Fluke 179 an indispensable tool for technicians and engineers across various industries․
Voltage Measurement (AC/DC)
The Fluke 179 accurately measures both Alternating Current (AC) and Direct Current (DC) voltage, essential for comprehensive electrical diagnostics․ Its wide measurement ranges accommodate diverse applications, from low-voltage circuits to higher-voltage industrial systems․ The multimeter provides high resolution and accuracy, ensuring reliable readings for troubleshooting and maintenance․
When measuring AC voltage, the Fluke 179 utilizes True RMS technology, delivering precise values even with non-sinusoidal waveforms․ For DC voltage measurements, it offers stable and dependable readings․ Users can select manual or autorange modes to optimize measurement precision and convenience․ Proper selection of input terminals and range settings is crucial for safe and accurate voltage measurements with the Fluke 179․
Current Measurement (AC/DC)
The Fluke 179 enables precise measurement of both Alternating Current (AC) and Direct Current (DC), vital for analyzing electrical circuit behavior․ Current measurements require careful attention to safety protocols and proper fuse selection to protect the instrument and the user․ The multimeter offers various current ranges, accommodating everything from milliamps to amps, ensuring versatility across different applications․
Like voltage measurements, AC current measurements benefit from True RMS technology, providing accurate readings even with complex waveforms․ DC current measurements deliver stable and reliable values․ Users can choose between manual and autorange settings for optimized precision․ Always disconnect power before connecting the Fluke 179 in series with the circuit to measure current, ensuring safe and accurate results․

Resistance Measurement
The Fluke 179’s resistance measurement function is crucial for assessing the opposition to current flow within a circuit or component․ Before measuring resistance, it’s essential to isolate the component from any power source to ensure accurate readings and prevent damage to the multimeter․ The instrument offers a wide range of resistance scales, from Ohms to Megaohms, catering to diverse testing needs․

Accuracy is paramount; ensure proper connection of the test leads to the component being measured․ The autorange function simplifies the process, automatically selecting the appropriate scale․ For low-resistance measurements, consider the lead resistance, which can introduce errors․ High-resistance measurements may be affected by environmental factors like humidity․ Regularly check the battery level for optimal performance during resistance testing․
Continuity Testing
The Fluke 179’s continuity testing feature quickly verifies whether a complete electrical path exists between two points in a circuit․ This is invaluable for identifying broken wires, faulty connections, or open switches․ When continuity testing, the multimeter emits an audible beep if the resistance between the test leads is below a certain threshold – typically around 30 to 50 Ohms․
Prior to testing, ensure the circuit is de-energized to prevent damage and ensure safety․ Select the continuity mode on the rotary dial․ Touch the test leads to the points you wish to test․ A beep indicates a continuous path, while the absence of a beep signifies an open circuit․ Remember to disable the HOLD function for real-time continuity checks․ This function is a fast and efficient method for basic circuit verification․
Diode Test Function
The Fluke 179’s diode test function is used to determine if a diode is functioning correctly, checking its forward voltage drop and identifying shorted or open diodes․ A healthy diode should exhibit a forward voltage drop typically between 0․5 and 0․8 volts when tested in the forward bias direction․ A reading of ‘OL’ (Overload) in both directions indicates an open diode, while a reading close to zero in both directions suggests a shorted diode․
To perform a diode test, select the diode mode on the rotary dial․ Connect the red test lead to the anode (positive side) and the black lead to the cathode (negative side) of the diode․ Reverse the leads to test the diode in the reverse bias direction, which should display ‘OL’․ Always ensure the diode is isolated from the circuit during testing for accurate results․ This function is crucial for component-level troubleshooting․
Temperature Measurement (Fluke 179 Specific)
The Fluke 179 distinguishes itself with integrated temperature measurement capabilities, requiring the use of a compatible temperature probe (sold separately)․ This feature allows technicians to directly measure temperature in Celsius or Fahrenheit, expanding the multimeter’s utility beyond standard electrical measurements․ Ensure the probe is securely connected to the meter before initiating a temperature reading․
Select the temperature function on the rotary dial․ The display will then show the measured temperature․ Proper probe placement is critical for accurate readings; ensure good thermal contact between the probe tip and the surface being measured․ Note the probe’s temperature range and limitations, as exceeding these can damage the probe or yield inaccurate results․ This function is invaluable for HVAC, industrial maintenance, and process control applications․
Capacitance Measurement
The Fluke 179’s capacitance measurement function allows for the assessment of a capacitor’s ability to store an electrical charge, a crucial diagnostic step in electronics repair and circuit analysis․ Before measuring, ensure the capacitor is discharged to prevent damage to the meter and ensure accurate readings․ Select the capacitance mode on the rotary dial, indicated by the ‘F’ symbol on the display․
Connect the test leads to the capacitor’s terminals, observing polarity if the capacitor is polarized․ The meter will display the capacitance value in Farads (F), microfarads (µF), or picofarads (pF)․ Note that stray capacitance from test leads can affect low-value capacitance measurements; consider using shielded leads for improved accuracy․ This function is essential for verifying the health of capacitors in power supplies, filters, and timing circuits․
Troubleshooting Common Issues
Encountering problems with your Fluke 179? A common issue is a blown fuse, often caused by attempting to measure voltage beyond the meter’s specified limits․ Always check and replace fuses with the correct amperage rating․ Another frequent concern is “Err Invalid calibration data,” indicating a need for calibration – a process best handled by a qualified technician․
If the display is dim or unresponsive, replace the battery․ Intermittent readings might suggest loose test leads or a poor connection․ Ensure leads are securely plugged in and the connection points are clean․ For unresponsive buttons, try cleaning around them with compressed air․ If issues persist, professional servicing is recommended to maintain accuracy and safety․ Remember to always prioritize safety when troubleshooting․
Err Invalid Calibration Data & Calibration Procedures
The “Err Invalid calibration data” message on your Fluke 179 signifies the internal calibration settings are corrupted or have drifted outside acceptable tolerances, impacting measurement accuracy․ This doesn’t necessarily mean the meter is broken, but it requires recalibration․ Attempting to use the meter with this error present will yield unreliable results․
Calibration should be performed by a qualified technician using specialized equipment traceable to national standards․ Do not attempt self-calibration unless you possess the necessary expertise and tools․ The procedure involves adjusting internal potentiometers to align the meter’s readings with known, precise values․ Regular calibration (typically annually) ensures continued accuracy and compliance with industry standards․ Contact Fluke-authorized service centers for professional calibration services․
Battery Replacement and Maintenance
Maintaining your Fluke 179’s battery is crucial for reliable operation․ The meter typically uses 9V alkaline batteries; replace them when the low battery indicator appears on the display․ Use only high-quality batteries to ensure optimal performance and prevent potential damage․ To replace, access the battery compartment (usually on the rear of the meter) and carefully disconnect the old battery, observing the correct polarity (+/-)․
Regular cleaning is also important․ Wipe the meter’s exterior with a damp cloth – avoid abrasive cleaners or solvents․ Store the Fluke 179 in a dry, dust-free environment when not in use․ Periodically inspect the test leads for damage and replace them if cracked or worn․ Proper care extends the meter’s lifespan and maintains accuracy․
Safety Precautions and Guidelines
Prioritize safety when using the Fluke 179․ Always disconnect circuits before measuring resistance or testing for continuity․ Never exceed the meter’s specified input limits, as this can cause damage and pose a safety hazard․ Inspect test leads for insulation damage before each use, replacing any compromised leads immediately․
Avoid working in wet or humid environments, and never use the meter with wet hands․ Be cautious when working with high voltages, and always follow established safety procedures․ The Fluke 179 is designed for use in CAT III 600V environments; understand category ratings to ensure appropriate protection․ Regularly review the complete safety manual for detailed guidelines and warnings․