brother label maker instructions p touch
Welcome to the Brother P-Touch Label Maker guide! This versatile device helps create custom, self-adhesive labels for office, home, or industrial use. With TZe tapes in various widths and colors, it offers durability and style. Read this manual to unlock its full potential and ensure safe, effective use.
1.1 Overview of the Brother P-Touch Label Maker
The Brother P-Touch Label Maker is a versatile, portable device designed for creating custom labels. It uses Brother TZe tapes in various widths and colors, offering durability and style. Ideal for office, factory, or home use, it combines ease of use with advanced features to meet diverse labeling needs efficiently.
1.2 Key Features and Benefits
The Brother P-Touch Label Maker offers portable design, easy-to-use interface, and compatibility with TZe tapes in various widths and colors. It supports USB connectivity for computer printing and uses rechargeable batteries for convenience. Features include customizable fonts, frames, and symbols, enabling users to create professional, decorative, or organizational labels with ease and efficiency.

Getting Started with Your Brother P-Touch
Unbox and set up your Brother P-Touch Label Maker by inserting batteries, installing a TZe tape cassette, and powering on. Read the manual for safety guidelines and basic operation steps to ensure proper use and optimal performance from the start.
2.1 Unboxing and Initial Setup
Unbox your Brother P-Touch Label Maker and remove all packaging materials. Insert six AAA alkaline batteries or install a tape cassette. Ensure the power is turned off during setup. Read the manual for safety guidelines and proper handling. Familiarize yourself with the device’s parts and controls before first use.
2.2 Understanding the Parts and Controls
Familiarize yourself with the Brother P-Touch Label Maker components: the display screen, navigation keys, print button, tape compartment, cutter, and power button. The LCD screen shows text and settings, while keys allow menu navigation and text entry. The tape compartment holds the TZe cassette, and the cutter trims labels neatly after printing.
2.3 Charging and Powering On the Device
To power your Brother P-Touch Label Maker, insert six AAA alkaline or Ni-MH rechargeable batteries. Alternatively, use the AC adapter for consistent power. Plug the adapter into the jack on the machine. Press and hold the power button until the LCD lights up. For Ni-MH batteries, charge them with a specialized charger before first use.

Safety Precautions and Guidelines
Always use the specified voltage and AC adapter. Avoid high humidity, direct sunlight, and extreme temperatures. Keep the device out of children’s reach and avoid touching metal parts post-printing.
3.1 General Safety Information
Always use the specified voltage and AC adapter to avoid damage. Keep the Brother P-Touch Label Maker away from direct sunlight, rain, and extreme temperatures. Do not touch metal parts near the print head immediately after printing. Store the device out of children’s reach and avoid using damaged batteries. Follow all safety guidelines to prevent accidents or malfunctions.
3.2 Handling the Machine and Tapes
Use only Brother TZe tapes with your label maker. Avoid pulling the tape during feeding or printing, as this may damage the cassette or machine. Clean the device with a soft, dry cloth; never use alcohol or harsh chemicals. Do not insert foreign objects into the tape exit slot or other openings. Handle the machine with care to prevent damage.
3.3 Environmental and Storage Considerations
Store the label maker in a cool, dry place, away from direct sunlight and high humidity. Avoid extreme temperatures, dusty environments, or exposure to moisture. Keep the device out of reach of children and avoid placing it near heaters or in areas prone to rain. Proper storage ensures optimal performance and longevity.
Installing Batteries and Power Management
Use six AAA alkaline or Ni-MH rechargeable batteries. Insert batteries with correct polarity. Avoid mixing old and new batteries or different types. Ensure proper disposal of used batteries.
4.1 Inserting AAA Alkaline Batteries
Insert six AAA alkaline batteries into the battery compartment. Ensure the power is off and batteries are aligned with correct polarity (+/- signs matched). Avoid mixing old and new batteries. Properly dispose of used batteries to protect the environment and maintain device performance.
4.2 Using Ni-MH Rechargeable Batteries
Insert six fully charged Ni-MH batteries, ensuring correct polarity. Charge them with a specialized charger before use. Avoid mixing old and new batteries or different types. Proper maintenance ensures optimal performance. Do not use damaged or leaking batteries to prevent potential damage or safety hazards.
4.3 Proper Battery Maintenance and Disposal
Avoid using sharp objects to handle batteries. Never dispose of batteries in fire or expose them to heat. Properly recycle spent batteries to prevent environmental harm. Check for damage or leaks before use and store batteries in a cool, dry place. Always follow local disposal guidelines for safe battery management.

Inserting and Using TZe Tapes
Use only Brother TZe tapes for optimal performance. Available in widths from 0.13 to 0.47 inches, these durable tapes ensure clear, long-lasting labels. Always install the cassette correctly and check environmental conditions before applying labels to ensure adhesion and color retention.
5.1 Installing a New Tape Cassette
Welcome to the guide on installing a new tape cassette in your Brother P-Touch label maker. Open the cassette cover by pressing the indicated area. Remove any existing cassette by pulling it straight up. Insert the new Brother TZe tape cassette until it clicks into place. Close the cover and ensure the tape feeds correctly under the guide for proper alignment and printing.
5.2 Feeding and Aligning the Tape Correctly
After inserting the tape cassette, ensure the tape feeds under the guide. Avoid pulling the tape during printing or feeding, as this may damage the machine. Proper alignment ensures smooth operation and prevents uneven printing. Use only Brother TZe tapes for optimal performance and longevity of your label maker.
5.3 Recommended Tape Widths and Types
The Brother P-Touch Label Maker supports TZe tapes in widths from 0.13 inches (3.5mm) to 0.47 inches (12mm). These tapes are durable and provide strong adhesion, making them ideal for indoor and outdoor use. Choose the width and type based on your labeling needs for optimal results and compatibility with your device.

Basic Label Creation and Printing
Enter text using the keyboard, format it using the LCD display, and print labels effortlessly. The Brother P-Touch Label Maker allows quick customization and printing of labels for various tasks, making it user-friendly and efficient for all your labeling needs.
6.1 Entering Text and Basic Formatting
Enter text using the keyboard, then use the LCD display to review and format. Options include bold, italic, and underline. Switch between uppercase and lowercase letters. Use the navigation keys to adjust font size and alignment. Preview labels before printing to ensure accuracy and minimize tape waste. Simple formatting enhances label readability and professionalism.
6.2 Previewing and Adjusting Label Settings
Use the LCD display to preview labels before printing. Adjust text, font size, and alignment using navigation keys. Check margins and layout to ensure proper formatting. Previewing helps catch errors and minimizes tape waste. Confirm settings before printing to achieve desired results. This step ensures labels are accurate and professionally formatted.
6.3 Printing Labels in Various Quantities
Print single or multiple labels with ease. Use the navigation keys to select the number of copies. Confirm the quantity and press the print key. The machine will print and cut each label automatically. For bulk printing, ensure the tape is sufficient. This feature saves time when producing identical labels in large or small batches.
Advanced Features and Customization
Print single or multiple labels effortlessly. Use navigation keys to select quantity, press print. Ensure sufficient tape for bulk jobs. The P-Touch efficiently handles large orders, saving time. Ideal for both small and bulk label needs, ensuring clarity and efficiency in every print job.
7.1 Using Frames and Symbols for Decoration
Enhance your labels with decorative frames and symbols. Navigate to the Frames & Symbols menu, choose from various options, and preview your design. Combine frames with text or symbols for a professional look. Ensure compatibility with your tape width for optimal results. Experiment with different styles to create visually appealing labels effortlessly.
7.2 Adjusting Font Sizes and Styles
Easily customize your labels by adjusting font sizes and styles. Use the menu to select from various font options, enlarge or reduce text size, and choose bold or italic styles. The LCD screen previews your changes, ensuring your labels look exactly as desired before printing. This feature adds flexibility to your labeling tasks.
7.3 Saving and Recalling Frequently Used Labels
Enhance efficiency by saving up to 30 frequently used labels in the P-Touch memory. Use the menu to save labels and recall them when needed. This feature streamlines repetitive tasks, saving time and effort; Labels are stored securely, ensuring quick access for future use.
Maintenance and Troubleshooting
Regularly clean the print head and machine with a soft cloth to ensure optimal performance. Check for dust or debris that may cause issues. Address common problems like jammed tapes or blurry text by referring to the troubleshooting guide for quick solutions.
8.1 Cleaning the Print Head and Machine
Clean the print head gently with a soft, lint-free cloth to remove dust or debris. Use a dry cloth to wipe the machine’s exterior and internal parts. Avoid using alcohol or harsh chemicals; Regular cleaning ensures optimal performance and prevents tape jams or blurry text. Do not pull the tape during cleaning to avoid damage.
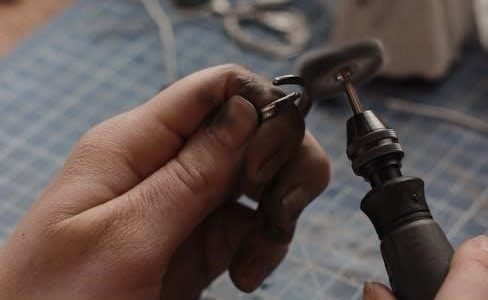
8.2 Replacing the Cutter Unit
Replace the cutter unit when it becomes blunt, as it may no longer cut tape cleanly. Order the Cutter Unit (TC-4) from an authorized Brother reseller. Turn off the device before replacing. Handle the cutter carefully to avoid injury. Ensure the new unit is securely installed for proper functionality. Regular replacement maintains performance.
8.3 Common Issues and Solutions
Common issues include blurry printing, tape not feeding, or labels not cutting properly. Clean the print head with a soft cloth for blurry text. Check for tape obstructions or incorrect installation if feeding issues occur. For incomplete cuts, ensure the cutter is sharp; replace it if dull. Refer to the manual for detailed solutions.

Connecting the P-Touch to a Computer
Connect the P-Touch to your computer using a standard USB cable. Insert the flat connector into the computer and the square connector into the P-Touch. Turn it on to establish the connection.
9.1 USB Connection Setup and Requirements
Connect the P-Touch to your computer using a standard USB cable with Series A (flat) and B (square) connectors. Insert the flat connector into the computer and the square connector into the P-Touch port. Ensure the device is turned on for proper connectivity and high-speed data transfer.
9.2 Installing Brother P-Touch Software
Download and install the Brother P-Touch software from the official Brother website. Run the installer, follow on-screen instructions, and ensure your label maker is connected via USB. This software enables advanced features, customization, and seamless label printing from your computer, keeping your device up-to-date with the latest functionality.
9.3 Printing Labels from Your Computer
Connect your P-Touch label maker to your computer via USB. Launch the Brother P-Touch software, create your label, and select the label maker as the printer. Ensure the device is powered on and properly connected. Click print to send your label design to the machine for high-quality output. Always confirm settings before printing.
Eco-Friendly Tips and Best Practices
Use genuine Brother TZe tapes to minimize waste. Avoid excessive tape usage and store the label maker in a cool, dry place. Properly dispose of used tapes and batteries, recycling when possible. Conserve energy by turning off the device when not in use to reduce environmental impact.
10.1 Reducing Tape Waste
Minimize tape waste by using the Brother P-Touch preview function before printing. Print only necessary labels and use the correct tape width for your needs. Align the tape properly and avoid pulling it during printing. Store tapes in a dry place and use every bit before replacing the cassette.
10.2 Energy-Saving Usage Habits
To save energy, use the Brother P-Touch label maker in power-saving mode and turn it off when not in use. Utilize Ni-MH rechargeable batteries to reduce battery waste. Disconnect the AC adapter when the device is not in operation to avoid standby power consumption.
10.3 Proper Disposal of Used Tapes and Batteries
Properly dispose of used Brother TZe tapes and batteries by recycling them through designated facilities. Avoid throwing them in regular trash to prevent environmental harm. Use sealed containers for batteries to prevent leakage. Check local guidelines for eco-friendly disposal options to ensure compliance with environmental regulations.

Accessories and Compatible Products
Enhance your Brother P-Touch experience with genuine TZe tapes in various colors and widths. Explore additional accessories like USB cables, storage cases, and software tools for expanded functionality and convenience.
11.1 Brother TZe Tape Options
Brother TZe tapes offer exceptional versatility for the P-Touch label maker. With sizes ranging from 0.13″ to 0.47″ (3.5mm to 12mm), they come in multiple colors, including specialized options like waterproof and tamper-evident. These durable labels provide clear, fade-resistant prints, ideal for both professional and personal use across various settings.
11.2 Additional Accessories for Enhanced Functionality
Enhance your P-Touch experience with optional accessories like carrying cases, stands, and power adapters. These tools improve portability, stability, and convenience. Additionally, software like P-Touch Editor allows advanced customization. Explore Brother’s range of compatible accessories to maximize efficiency and versatility for both personal and professional labeling needs.
11.3 Compatible Software and Tools
B Brother offers P-Touch Editor and Label Editor software for advanced label design. These tools allow users to create intricate designs, import images, and customize fonts. Compatible with various P-Touch models, these software solutions enhance functionality and streamline label creation. Download them from Brother’s official website for seamless integration with your label maker.
Thank you for using the Brother P-Touch Label Maker! Always follow eco-friendly tips, explore creative labeling, and store the device properly. Happy labeling!
12.1 Summary of Key Instructions
Always use Brother TZe tapes for optimal results. Insert AAA alkaline or Ni-MH batteries correctly. Feed the tape properly and avoid pulling it during operation. Regularly clean the print head and replace the cutter unit when necessary. Store the device in a dry, cool place to ensure longevity and performance.
12.2 Encouragement for Creative Labeling
Unleash your creativity with the Brother P-Touch Label Maker! Explore various TZe tape widths and colors to design unique labels for any occasion. From organizing spaces to crafting gifts, this tool offers endless possibilities. Experiment with frames, symbols, and fonts to make your labels stand out and add a personal touch to your projects.